Embroidery stitches for letters give a personalized touch to the product. It is an earnest way of making a special gift for someone special. Embroidery letters are a fanciful way to express your feelings in a gift.
Ideas for Embroidery Letters:
Embroidery letters are most popular in babywear. Many people embroider letters on baby bibs, clothes, blankets, etc to celebrate the birth of a baby and make it a treasurable item for a lifetime. Ballet bags, pillow-cases, t-shirts, samplers, handkerchiefs, and caps are all used in embroidered letters.
Tools Used in Embroidery Letters:
Hoop is best for embroidery letters; it clasps the fabric and prevents crinkle. If embroiderers want to embroider a long name, then a small hoop should be used, as it can easily move on the fabric. Needles used in embroidery letters have a long hole through which a thick thread can be passed easily.
Fonts:
The choice of font depends on the embroiderers but, few factors should be considered.
Size:
If embroiderers want a small letter word, then it is advisable to use a simple font. The small letters cause a problem in embroidering around angles and curves.
Legibility:
Before embroidering letters on the cloth, it is best to try a few fonts as it is not necessary that the design appearing exquisite on paper might look good with needle and thread on fabric.
Appearance:
Font should be selected considering the final product. The font should complement the product.
Computer Programs for Embroidery Letters:
- Word
- Excel
- Google Docs
- Photoshop
- Illustrator
- WPS Office
- Word Perfect
The ideal program is one in which font size and style can be adjusted. Sometimes, multiple tries are required to get the desired size and style on some above-mentioned programs. If embroiderers want to embroider multiple letters.It is recommended to adjust the base to set the letters and make sure the spacing between letters is even.
Transfer Letters on Smooth Clothes:
In the embroidery letters process,the foremost step is to transfer the letters on the fabric. The letters can be transferred in many ways.
Free Hand:
The letters are drawn on freehand. There are two different types of pen. One is permanent, and the other washes out.
Transfers:
The design can be transferred by tracing or writing letters on a tracing paper. Place the tracing paper on the cloth to check the size. If the size is correct, then trace the design on the fabric with the transfer pencil. The iron-on transfers are used to transfer letters on clothing. But these should be carefully used as they are permanent. So, the tracing lines should be covered with stitches.
LightBox:
It also aids in transfer letters or images on the clothing. It is a leveled surface box and has a light at the back. When a cloth is placed on the lightbox, the design can be seen through the cloth then the embroiderers can trace the letters by using a non-disappearing ink pen or a graphite pencil.
If the embroiderers do not have a lightbox, they can use a window, but its use will be limited to daytime only.
Transfer Letters on textured Cloths with Nap:
The previously mentioned transferring methods do not work on textured fabric, for instance, baby blanket or towel. The nap or deep pile also does not give the best results. So take a paper and write letters on it, then place the paper on the cloth. Use different color threads and make a straight stitch over the line, then rip the tissue it will leave the point to follow in the embroidery.
Embroidery Letter Stitches:
After choosing letters for embroidery, the next step is a selection of stitches. There are several options of stitches that are good for letter embroidering. The decorative stitches are accommodated with the help of border stitching or letter outline. Let us take a look at some of the popular stitches, and each stitch has variations and can be combined with other stitches.
Applique:
If the embroiderers want letters to be bold and exquisite, then applique fabric letters are the best choice. The stability is given to letters by double-sided Vilene. The best choice for appliques is the uppercase letters with bold simple fonts. These appliqued letters are sewn onto the fabric by blanket stitch. The blanket stitch has the benefit of built-in edging. This built-in edging provides a neat final look to each letter.
Chain Stitch:
It is a popular stitch for lettering. This stitch is used in a curve letter as it works best in navigating curves. There are two different types of chain stitch such as braided chain stitch and double chain stitch. These variations are used to add thickness and depth to the normal chain stitch. It is recommended to decrease the length of the chain stitch in small letters.
Couching Stitch:
Couching stitching is done over thicker threads. The main base thread could be any floss strands used in embroidery or yarn.
Cross Stitch:
It is also popular to fill up the outline of the letters. If the outline of letters is made with backstitch, then the filling becomes much easier. There are different variations of cross stitch in different countries to make embroidery interesting. Among all cross stitch, Hungarian and Greek cross stitch is more interesting and best for filling letters.
French Knots:
If embroiderers want letters to look exquisite and give raised effect, then French knots are the best choice for filling embroidery letters. Different knot stitches, for example, Bullion stitch can also be used. The dots in the letters i and j look cute and exquisite with French knots.
Long and Short Stitch:
This stitch can be used with different shades of color. It helps to fill up the letters and help to fill in the areas of different sizes in letters.
Satin Stitch:
It is one of the most popular stitches in embroidery lettering, and it requires practice to make a perfect satin stitch. Satin stitch looks beautiful in a shiny thread as compared to matt threads.
Embroiderers will have to determine the direction of stitches. The embroidery design with C direction looks neat and exquisite because all stitches are in the same direction. A raised effect is given to embroidery letters by adding padding then a satin stitch is done on the embroidery letters.
Padding can also be given by stitching inside the outline of letters with a straight stitch or seed stitch then satin stitch is done to give raised effect to the embroidery letter.
Seed Stitch:
Seed stitch is done along with other stitches. It can not be used alone. It is a fine and fastidious stitch used to fill up spaces. If the outline of the letters is stitched with a backstitch,the center of the letters can be filled with a seed stitch. It is also used to give a padded look below the satin stitch.
Stitches Used in the Hand Embroidery of Letters:
Below are common types of hand embroidery stitches.
Backstitch:
Backstitch is the most commonly used stitch for embroidery letters. It is the best choice for outlining big block letters. This stitch can be done easily and does not take much time. This stitch can be used to cover space in the center of the big block letters or fine letters. Backstitching is done by putting a needle under the fabric and inserting a needle and thread into the fabric. It makes the first stitch, then again pulls the needle under the fabric and makes a full stitch length in a way that leaves a gap between the last stitch and the needle. Now, make a full stitch line by bringing back the needle and passing through at the end of the last stitch.
Running Stitch:
These stitches are very easy even beginners can make these stitches easily. This stitch appears as a dashed line. The up and down movement of stitches makes its application easier. It is used to generate simple stitch letters, and it’s best for big fine letters. Running stitches can be done by the stitching process or make one stitch at once. The stitch is made by passing the needle and thread through the cloth and bringing it in and out, and gripping a cloth with every stitch, the dashed line will start to form with the pulling of the needle through the fabric.
The embroidery letter stitches in the embroidery machine speed up the process. The embroiderers can make hundreds of stitches at once.
Stem Stitch:
This stitch is used to make the border of letters. This embroidered border letter can remain the same or can be filled in by other stitches. This stitch appears as a twisted rope and adds delicacy to the embroidered letters. This stitch is the best choice for the cursive font. While making stem stitch, a rule should be in mind that the direction of stitch should remain the same, for instance, right-handed sewers should make stitch from left to right and left-handed sewers from right to left. In other words, it is important to move the hoop while stitching around curves to keep the same direction. This stitch is made by bringing the thread through the cloth from the tail of the last stitch and then bringing back the needle to the tail of the newly made stitch. Keep doing this until the letter is finished.
Split Stitch:
This stitch adds up the surface and proportions to the embroidered letters and provides them the look of a braid. This stitch is similar to the backstitch, but unlike the backstitch, the needle passes through the center of the last stitch and results in the splitting of the stitch to give a dignified design. Split stitch is made by passing a needle and thread from under the cloth and bringing it back down again to make one stitch, and then the needle is passed through the center of the last stitch, which results in the splitting of thread. Repeat the process until the letter is completed. This stitch is best for small size letters and cursive fonts.
Rules for Embroidery Letter Stitches:
Despite the stitch type, these four rules are applied to all stitches in embroidery letters.
- Before starting a new letter, the thread should always end properly. If the letters are in cursive font or small size or close to each other, then this rule can be avoided
- The direction of stitches should be determined. The direction of stitches in embroidery is not the same as writing letters
- Some letters require stitching in two parts, so to reach the new starting point turn the product over and fold the thread around the done stitches despite stretching the thread on the back.
- When embroidering the letter’s outline, decrease the stitch length.
How an Embroidery Digitizing Company can Help Embroiderers with letter embroidery?
Embroidery is the process of creating designs on cloth. Embroidery letter digitizing is more difficult than other embroidery types. Before starting embroidery letter digitizing few factors should be considered. The foremost step in embroidery letter digitizing is to make sure that the final product will be the same as on computer and software. To achieve the same, embroiderers will have to adjust stitches and size.
Push-Pull Line:
Sometimes embroidery machines make extra stitches at the start and end. So to avoid this, digitizers should draw a line above the letter. The line is drawn by pressing Ctrl C and left-click it, and adjust the value to approx 0.01 inch. This line is called the push-pull line.
Merge the Lines:
After drawing a push and pull line above the letter the next step is the merging of lines. The merge option is at the top in the right corner, then click G it will merge the selected line with the bottom line. The line can be moved or dragged by pressing G, but editing can not be done.
Aligning the Line:
The next step is alignment. The line at the top and bottom should be drawn in a way that makes the best alignment.
Making a Straight Point:
Now the next step is to draw a straight point. To draw a straight line Input A tool is used, left-click it, and hold the control key along with it. The control key helps to draw a perfect line for the embroidery letters. Then click D to conceal the background.
Closest Point Lettering:
It is the most important factor that defines the embroidery digitizing quality and must be accurately implemented in the digitizing process. The initiation point of the next part should be closer to the ending point of the last part. If this is not followed, the machine will take extra stitches resulting in more thread usage and wastage of time. The digitizing quality will be higher with the lowest trim.
To achieve the closest point lettering, press to make the endpoint, start point, angles, and edge points visible. The digitizers will have to put the ending point of the last part to the starting point of the next part. This feature will enable the embroidery machine to make the ideal trim.
The next step is to press the L button. This L button will help to check the grid of the letter or view and to check the alignment of the letters. The stitches can be viewed by pressing the T button. The final view, which is called the true view, can be checked by pressing the T button.
The digitizing company helps the embroiderers to maintain the quality standard with low consumption of thread in less time.
Best Embroidery Digitizers in the USA:
We are living in a modern era surrounded by technology and the internet. The hassle of searching best embroidery digitizing services in USA is no longer a problem as embroiderers can search digitizing services on the internet with a single click.Start searching and exploring on the internet many companies offering their services. By searching and exploring embroiderers can find a reliable and best embroidery digitizer.
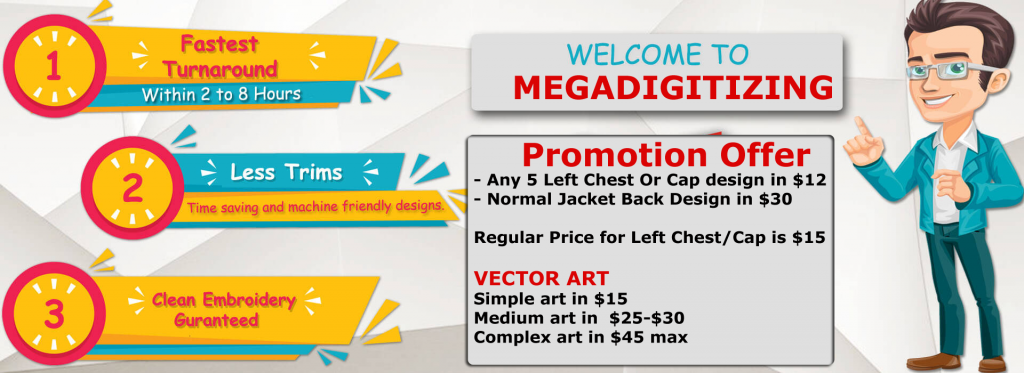
Mega digitizing is the solution for all the problems of embroiderers. We have the best team of USA digitizers and charge only $12 for any left chest or cap design. We have professional and highly trained staff who are capable of handling nail-biting tasks. We have been working for over two decades and our experience enables us to get the work done with perfection. Our prices are satisfactory to the client. We don’t overcharge our customer nor we deliver the poor quality that is proved by the increasing number of customers each day.
Everyone has concerns while opting for online services but we share our portfolios with the customer and we make customers satisfied and relax so that they can discuss their project with us. Our embroidery digitizers communicate with the customers to understand the client’s requirements and deliver the product according to the Client’s expectations.
You can reach us without any trouble. We are just an email away or you can talk to our expert through the live chat on our website.
We deliver the results within the shortest time. The rapid delivery orders are handled by our most experienced and professional experts to ensure that all the requirements of the customers are taken care of with maintain quality. Our system has an automated system to prioritize the rush order to deliver the customer within committed time so we advise our customer to mention the delivery date while placing an order. We would be happy to facilitate you in your upcoming projects.
CLICK HERE TO REGISTER WITH US