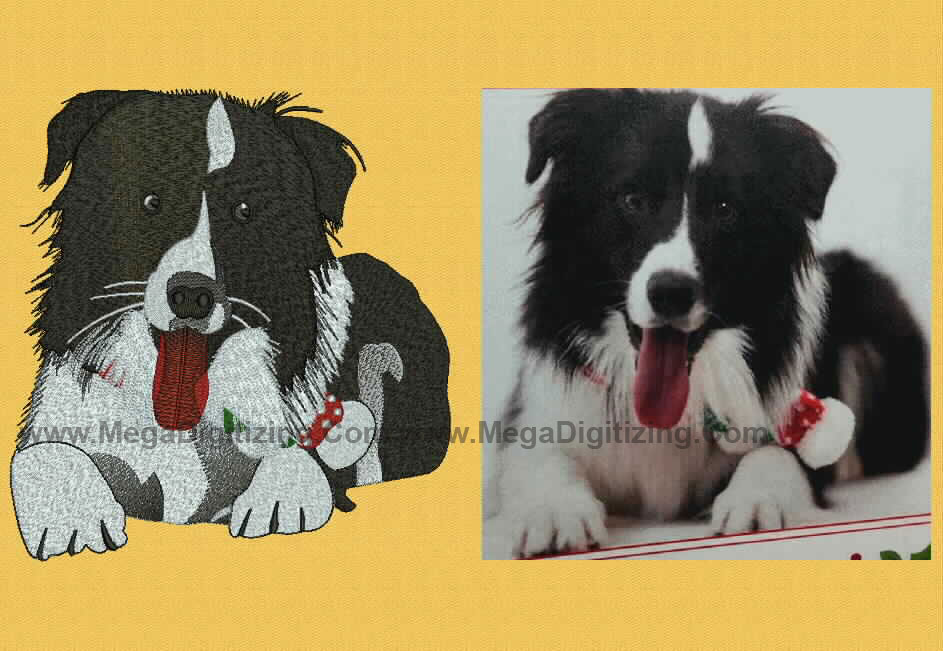
All you need to know about Digitizing Dog Embroidery Designs
It is one thing to learn how to digitize letters on fabric but a whole new level to be able to digitize realistic embroidery designs of animals such as a dog. There are a lot of challenging factors to be considered while making a dog embroidery designs. Like any good painting, a flawless dog embroidery designs needs to have a good texture, colors and figment of development so it can portray that feeling of a real dog. The image itself may illustrate a story with sentimental values attached to it. Digitizing a genuine embroidery design requires monstrous accuracy so one should plan accordingly.
Interestingly, the biggest hurdle to overcome during this process is to get the fluffy coat of fur on point and convert it into the right layers. So we plan to share with you our expertise on how you’ll be able to achieve this look which can bring life to your design making it absolutely flawless and real.
By the time you will have finished reading this article, you will be able to master the skill of creating the right structure, fur and muscles for the body of your pet animal’s image into a digitized embroidered version. Following are some tips that maybe helpful in your journey. Before we go for the list of tips first we need to decide which embroidery software we would be using.
Choosing right embroidery software for digitizing
1. Preparing your dog’s photograph for machine embroidery:
The essential element to any fine digitizing is it’s precision and clarity. This determines its quality. Although you can use a drawing or painting to create a dog’s digitized design, it is recommended that you refer to a real photograph. This will help you get the right base for your design. Your photo should provide more pixel information, should be of high-caliber so this can smooth the way for the digitizer to comprehend with ease and get over the complicated parts.
You need to make a strategic plan on how to start your work and convert artwork into PES Format or convert your artwork in DST embroidery machine format. The most common practice is to start your digitizing process and then refer to your photo of the dog which is absolutely wrong. This may alter your perception of the minute details and could result in bad quality. What you need to do is picturize the dog species in your head. Feel its body muscles, the look of the eyes , texture of the fur etc. Start observing all the details in the photograph , note it down and then put all the pieces of information together. This will ensure that the digitizer may not overlook any important feature in the photo which may be essential to make your digitized embroidered design more realistic.
Firstly, before creating any design, one should always keep sizes in mind, whether it’s big or small. Smaller ones require harder work as there are a lot of minute things going on due to lesser space which needs to be worked out. Keeping that aside, recognize the imperative highlights of the image and utilize them to design your digitized embroidery. This will add life to your design.
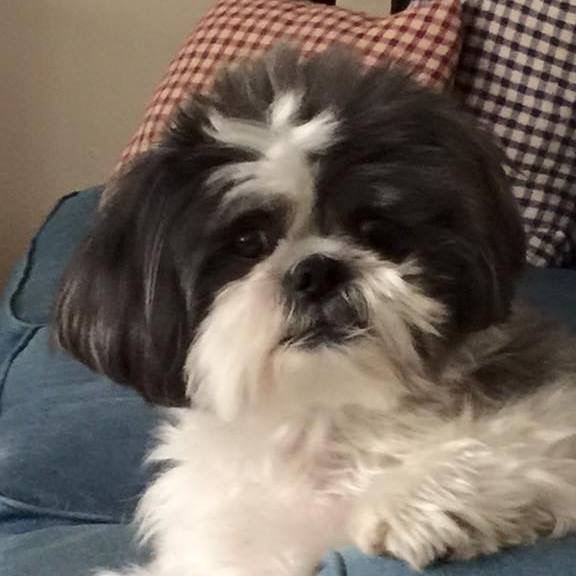
Dog Picture for Digitizing
While bigger designs also comes along with a set of different challenges. There should be a balance in the formation of the design or it will turn out very dull and monotonous.
2. How to create good texture for the hair:
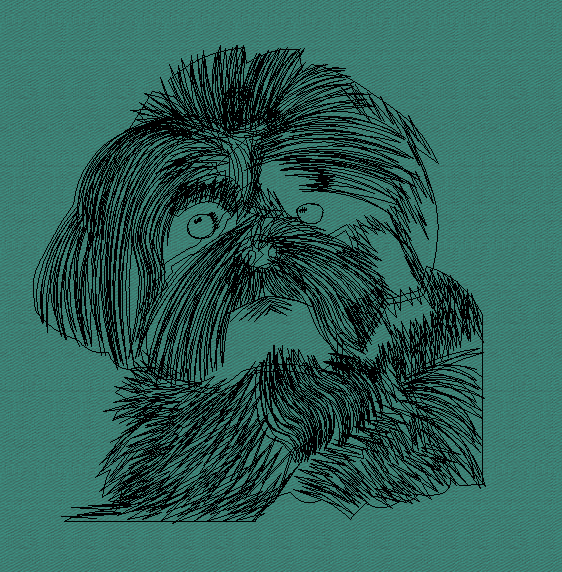
In order to make dog embroidery designs absolutely lively, you need to figure out muscle structure of the body and the how its hair is handled in the photo. Which way is it headed? In order to create a good texture for its fur, use a outline to first put the hair in place. Observe its directions and follow them just like you would do to any map. Be careful of the colors that you use so you maybe able to distinguish between the other shades and the outline.
3. Color Palette:
The basic key to creating a realistic digitized design is the usage of diverse colors and shades. But we would recommend for you to be on the safe side and only try more colors and shades if you have good hand on it. Otherwise only use certain shades to get your desired outcome.
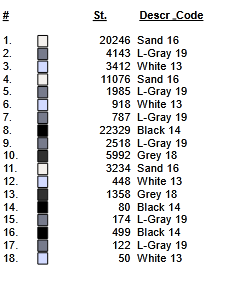
Colors-in-dog-digitizing
4. How to put things together:
Now there are two things to consider while preparing your design for machine embroidery:
-The Foreground
-The Background
The foreground needs to have vertical and angular filling. So what you need to focus is try to make it stand out. While the background will have horizontal filling.
5. Selection of stitches:
So now let’s discuss the role of the most important factor which is the correct usage of the stitches. Being in the digitizing industry for embroidery for over 15 years, we know exactly how this can make or break your design. So the digitizer should have complete expertise on the choice of stitches, what their different types are and how you may be able to build more character to the design.
Few tips and techniques that you can follow are further explained:
Underlay:
Remember to start your design with underlay to stabilize your creation. The key to success is to use thinner stitches for smaller designs and thicker ones for larger designs. But there can be other situations where you will have to use vice versa. Go for lesser dense stitches for the underlay as compared to normal caps or apparel embroidered designs. So now that you’ve decided how to start your work, let’s move on to the next point.
Tatami stitch:
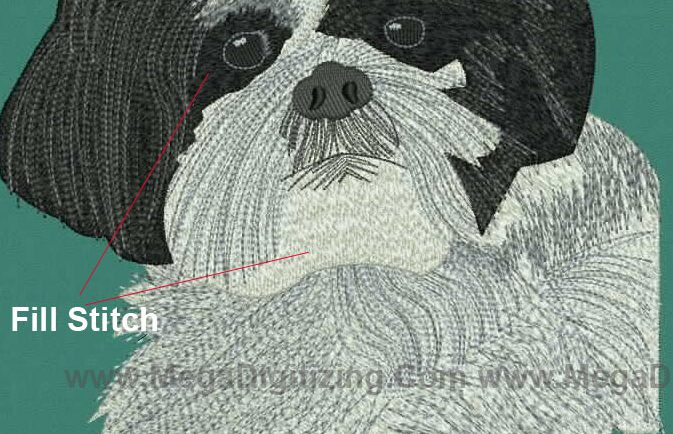
For our next move, you need to be concerned how to fill major portions of the design. Fill stitches which can be also called tatami stitches are used for this purpose. By using offset fraction, you can get that fuzzy effect of the fur while you can also manage the measurements of the stitch to your needs respectively.
Different dog breeds need different setting for digitizing e.g dogs with less fur like ‘Boxer’ need to be set at lower fraction of offset. Whereas the breeds with more dense fur like ‘Siberian Husky’ need higher setting of offset fraction as well higher length of stitch. Typical range of 0.5mm to 0.6mm stitch density is suggested.
Column stitches:
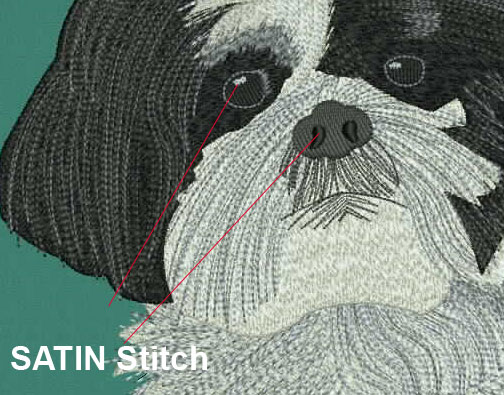
Column stitches also known as satin stitches are usually used for both large and small designs. Satin stitches are used to digitize teeth, eyes, ear outlines and tiny detailing of smaller body parts. These types of stitches are suitable with light underlay, or else you will end up in creating design stiffer, which will in turn break threads and sometimes needles as well. It is not recommended to use underlay while you’re shading and adjust the stitch density somewhere between 0.7- 1 mm
Run Stitch:
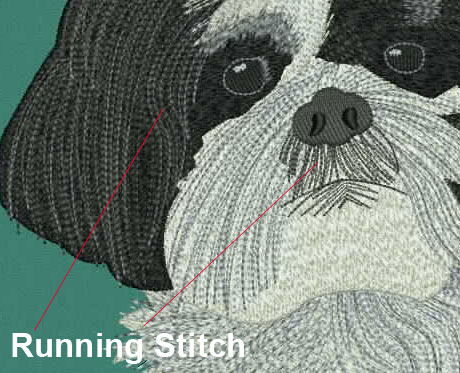
Minute details such as eyelashes can be done by run stitches. Also called bean stitches. Keep the length between 3-4 mm and you’ll achieve a nice finish.
You can learn more about stitches on Type of Embroidery Stitches.
Direction of stitch:
Now focus on the direction of the hair of dog. Follow that direction and create angled stitches according to the photo of dog. This needs to be handled with great expertise, one wrong step and it will go out of proportion. Check each fragment of the dog’s face separately to know the directions of hair going upward or downward and digitize exactly to create good texture. So in short if you master the skill to get the angle correct, you will get your design digitized life-like in no time.
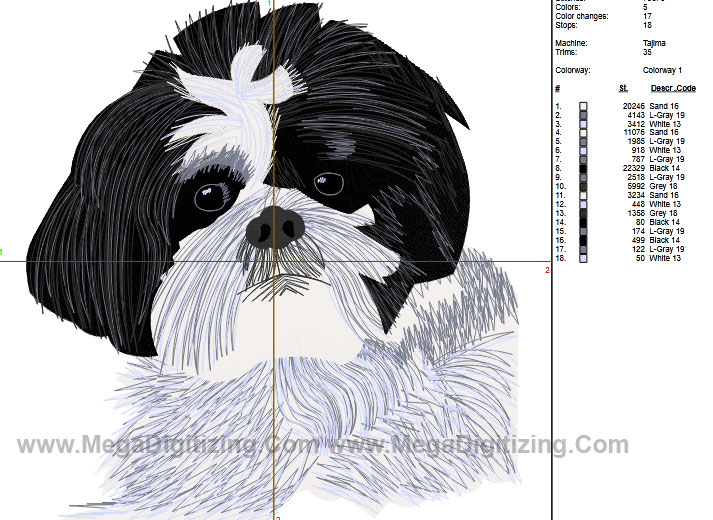
Final Result
Following these techniques, you’ll be able to create your own digitized dog embroidered design and get that real feel having the illusion of movement to it. But in case you’re short of time you may ask for our assistance. We’re just a click away if you need our digitizing service and be sure we make no compromises on quality. MegaDigitizing can get the job done for you at the lowest prices!
MegaDigitizing Perfect in Dog Embroidery Designs
Following these techniques, you’ll be able to create your own digitized dog embroidered design and get that real feel having the illusion of movement to it. But in case you’re short of time you may ask for our assistance. We’re just a click away if you need our digitizing service and be sure we make no compromises on quality. Mega Digitizing can get the job done for you at the lowest prices!
Read more about embroidery related topics
CLICK HERE TO REGISTER WITH US


